Beryllium copper (BeCu), also known as copper beryllium (CuBe), beryllium bronze, and spring copper, is a copper alloy with 0.5—3% beryllium and sometimes other elements. Beryllium copper combines high strength with non-magnetic and non-sparking qualities. It has excellent metalworking, forming, and machining properties. It has many specialized applications in tools for hazardous environments, musical instruments, precision measurement devices, bullets, and aerospace. Beryllium alloys present a toxic inhalation hazard during manufacture (this definition from the Wikipedia)
The beryllium bronze is perfect material made the complex shapes trim on eyeglasses and sunglasses filed. And the technic always using the casting.
Actually, this technic using in many fields, like the jewelry industry (like earrings, finger rings and necklaces, etc.), eyeglasses industry (like trims, logos, special shapes temples,) and metal ornament field (like arts and crafts, brooch and hairpin.)\
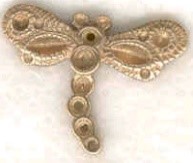
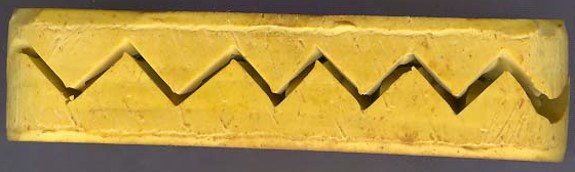
There are pictures to show what the trims of eyeglasses field look like:
Next, we will show you how made this kind of trims and logo of eyeglasses
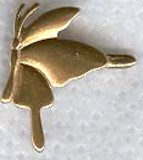
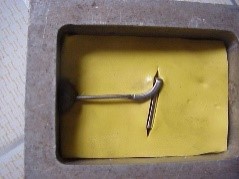
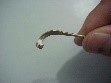
Before making a mold we will make a prototype one. The process is making the tech drawing according to clients provide the sample. Then revise the tech drawing to fit for the requests from clients. Follow the drawing to make the prototype. This kind of trims normal made by Fine carving or by hand, please see the picture which a prototype,
, You can see the shape of the trim and there is a long hand shank.
1.2.1 Plastic model made
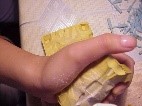
1.2.1.1 prepare the silicone like the picture
1.2.1.2 there is a metal mold need to prepare in first and put one piece of silicon at the button of the mold, then put the prototype on the silicon material, make the prototype in stable, like the picture
1.2.1.3 Put the one piece of silicon on the top to cover the prototype, keep the prototype in the middle of two pieces of silicon, like the picture show
1.2.1.4 Warm the silicon mold
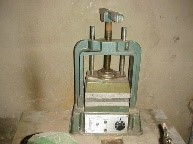
Put the metal mold with the silicone gel mold in the warm small machine, press the silicon with big strength and warm it with 20-25 minutes around.
1.2.1.5 Make the mold cold
Redraw the mold from the small warm machine, put it in the water, waiting it becomes cold.
1.2.1.6 Take off the mold
Take off the silicone mold from the metal mold, then cut the line shape as the picture show.
There is something needs to notes.
A: When putting the mold in water, we are not waiting for the mold cold completely, still need the mold to keep warm, If our hand can touch and work on it, that is ok, because if get the silicon mole completely cold, the silicon will get harder, it is hard to cut if get harder.
B: Cut the position is very important, we chose to cut the position which is at the hand shank of the prototype.
1.2.1.7 Take off the prototype
After cutting off the silicon mold, took off the prototype, the silicon mold will leave a cavity of the prototype shapes, use the same way to do more silicon molds to produce the big quantities.
1.2.2 Wax sample made
1.2.2.1 pray or wipe the Lubricating powder on the cavity silicone mold,
A:The powder function is easy to take off the mold after injection the wax, meanwhile, avoid the silicon mold and wax melt together after higher temperature and hard to take them off.
B: The powder we choose the children powder,
1.2.2.2 Injection wax
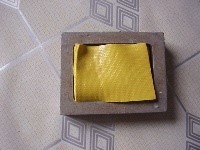
Warm the wax to fluid, then injection the wax to the silicon mold,
Note: A: Wax normal have two colors, one is Cyan which is soft, and the yellow color which harder, but there still have two option of place, domestic and oversea.
B: Injection wax need full of the mold.
C: control the temperature, time, and gas pressure.
1.2.2.3 took off the wax model
After injection the wax a few minutes later and waiting it get cold, then took out the wax model and check the model whether complete.
1.2.2.4 Plant the wax model tree.
Put the wax model on a “metal tree”, make them on the tree, and stable.
1.2.3 Gesso made
1.2.3.1 Covered the steel bottle with kraft paper or tap paper.
1.2.3.2 Put the “tree” into the steel bottle.
Notes: A: Covered the steel bottle completely avoid the gesso liquid out.
B: The kraft paper easy to burn, it will pay more attention.
C: The “tree” head needs up.
1.2.3.3 Vacuum extraction
Covered with a transparent bottle completely, keep the air can not get into it, operate the small machine to take off the air.
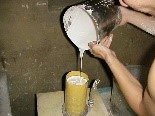
1.2.3.4 Injection the gesso
Prepare the gesso as a liquid, and pour in the gesso into the steel bottle, like the picture show.s
1.2.3.5 After pouring, shake the steel bottle to keep the gesso full of the steel bottle completely, and vacuum extraction again,
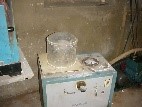
1.2.3.6 Warm the steel bottle with high temperature,
Note A: Shake the steel bottle all the time when vacuum extraction. If the air was not extracted completely, the gesso will let the air bubble, when injection the beryllium bronze, the surface will leave the small hole,
B: After the wax tree with gesso becomes dry, then put it in the warm machine, when higher temperature, the outside kraft paper, and wax mold will become a liquid, and flow out. Then Gesso mold is ready with the cavity inside.
1.2.4 Casting mold
1.2.4.1 Put the steel bottle into the melt machine and make the bottle stable
1.2.4.2 Prepare the beryllium bronze. And put the solid beryllium bronze into the steel bottle,
Note: the solid beryllium bronze will become liquid when the temperature reach between 800-1000 degree, when the beryllium bronze becomes blue fire, then it was ready.
1.2.4.3 Put the gesso mold into the casting machine
1.2.4.4 Pour the beryllium bronze as a liquid into the gesso mold.
1.2.4.5 Took off the bottle and get them cold.
1.2.4.6 Put them beryllium plates into the water and waiting for cold.
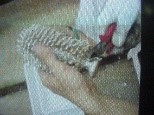
1.2.4.7 Took out the beryllium bronze tree.
1.2.4.8 Split the gesso from the tree
1.2.4.9 Cut the goods from the tree.
1.2.4.10 Cut off the hand shank.
1.2.4.11 Polish and tumbling the beryllium bronze goods
1.2.4.12 Quality control
Those are all processes of making the eyeglasses and sunglasses trims, logos, etc.

 , You can see the shape of the trim and there is a long hand shank.
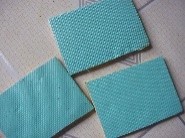
 .
. .
. ,
, .
. .
. .
. .s
.s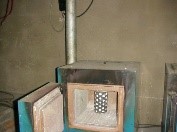 ,
, .
. .
. .
.